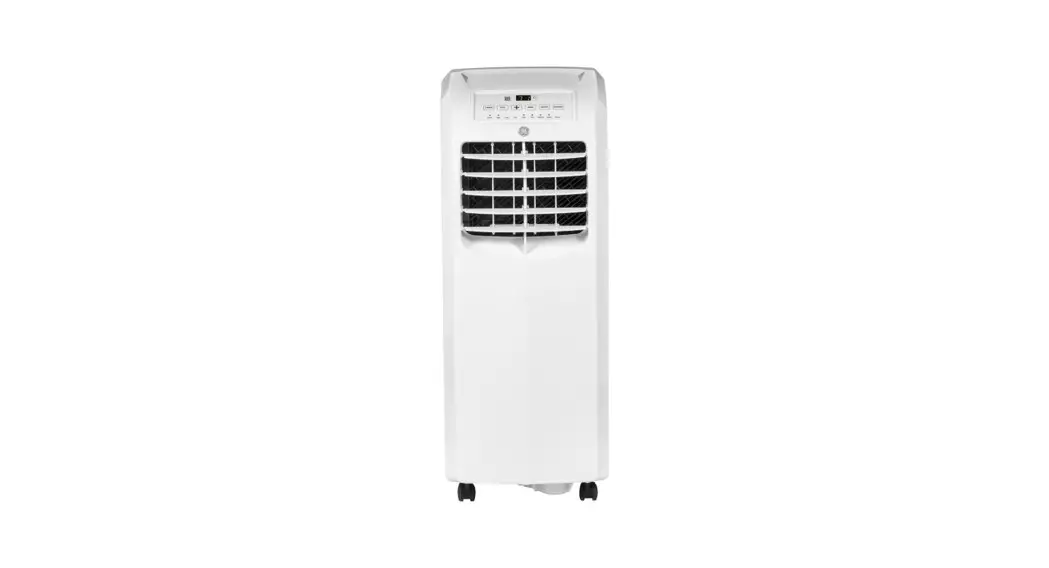
GE APPLIANCES Portable Room Air Conditioner

Models
- APCD07
- APWD07
- APCD08
- APWD08
- APSD08
- APCD10
- APWD10
- APXD10
THANK YOU FOR MAKING GE APPLIANCES A PART OF YOUR HOME.
Whether you grew up with GE Appliances, or this is your first, we’re happy to have you in the family.
We take pride in the craftsmanship, innovation and design that goes into every GE Appliances product, and we think you will too. Among other things, registration of your appliance ensures that we can deliver important product information and warranty details when you need them.
Register your GE appliance now online. Helpful websites and phone numbers are available in the Consumer Support section of this Owner’s Manual. You may also mail in the pre-printed registration card included in the packing material.
IMPORTANT SAFETY INSTRUCTIONS
Warning: To reduce the risk of fire, electrical shock, injury to persons, or damage when using the air conditioner, follow basic precautions, including the following:
- Read all of the instructions before using this appliance.
- Plug into a grounded 3 prong outlet.
- Do not remove ground prong.
- Do not use an adapter.
- Do not use an extension cord.
- Do not operate the air conditioner if it has a damaged cord or plug, if it is not working properly, or if it has been damaged or dropped.
- The air conditioner should be serviced only by qualified service personnel. Call an authorized service company for examination, repair, or adjustment.
- Disconnect power before servicing.
- Disconnect power before cleaning.
NOTE: Turning off power by pressing the Power button does NOT disconnect the appliance from the power supply. - Do not install or use the air conditioner in any area where the atmosphere contains combustible gases or where the atmosphere is contaminated. Avoid any chemicals coming in contact with your air conditioner.
- Do not store anything directly on top of the air conditioner.
- Use two or more people to move and install air conditioner.
- Never operate the air conditioner without the filters in place.
- Do not use the air conditioner near a bathtub, shower or wash basin or other wet area.
WARNING: Risk of Fire or Explosion. This unit contains flammable refrigerant. Additional safety precautions must be followed.
- Do not use means to accelerate the defrosting process or to clean, other than those recommended by the manufacturer.
- The appliance shall be stored in a room without continuously operating ignition sources (for example: open flames, an operating gas appliance or an operating electric heater.
- Do not pierce or burn refrigerant tubing. Be aware that refrigerants may not contain an odor.
- Keep ventilation openings clear of obstruction.
- When handling, installing, and operating the appliance, care should be taken to avoid damage to the refrigerant tubing.
- Do not drill holes in the unit.
- Maintenance, cleaning, and service should only be performed by technicians properly trained and qualified in the use of flammable refrigerants.
- GE Appliances does not support any servicing of the air conditioner.
- Dispose of air conditioner in accordance with Federal and Local Regulations. Flammable refrigerants require special disposal procedures. Contact your local authorities for the environmentally safe disposal of your air conditioner.
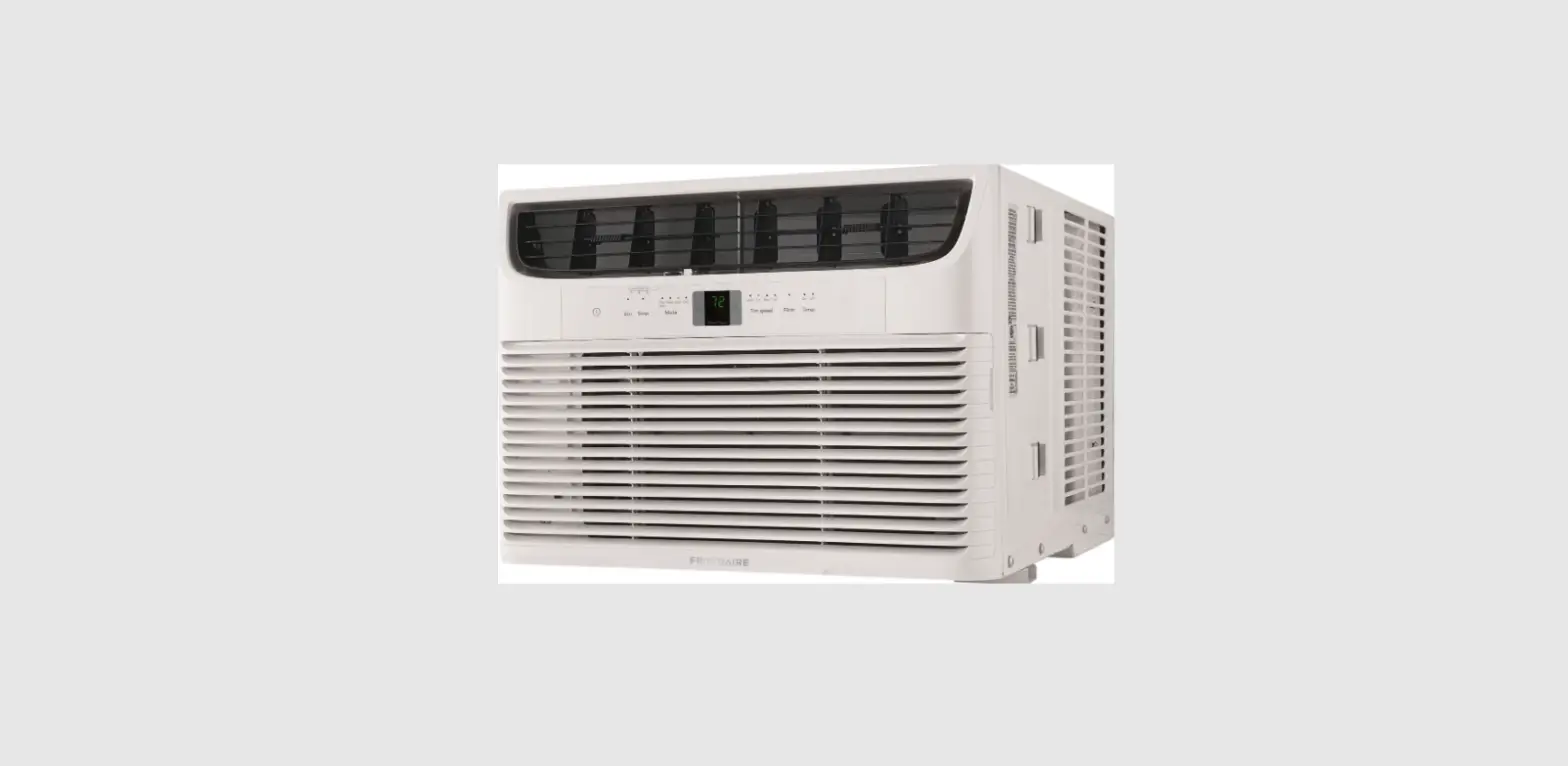
Controls
Features and appearance will vary.
Lights next to the buttons on the air conditioner control panel indicate the selected settings.
- A. Control Panel Display
Displays the Set Temperature in degrees Fahrenheit or degrees Celsius, or the hours remaining in a Time Delay. - B. Power Button
Turns the air conditioner on or off.
NOTE: Turning off power by pressing the Power button does NOT disconnect the appliance from the power supply.- Press the Power button. The Power indicator will illuminate and the AC will turn on.
- C. Mode Button
Press the Mode button to toggle among the operating options. The corresponding indicator will illuminate: Cool – Cools the room to the set temperature
Fan – Circulates the air in the room without cooling Dry – Reduces the humidity in the room - D. Fan Speed Button
The fan speed can be adjusted from Low, Medium, to High speed when the air conditioner is in operation. NOTE: The fan speed cannot be adjusted when the unit is in Dry or Sleep modes.- Press the Fan speed button to toggle among the three speeds. The corresponding fan speed indicator will illuminate.
- E. Timer / Temperature Set Controls
Adjusts the Temperature or Hours in Time Delay.
To Set the Temperature:- Press the Mode button until the Cool mode is selected.
- Press the Up Arrow or Down Arrow buttons to select the desired temperature.
NOTE: The temperature cannot be set when the air conditioner is in either Fan or Dry mode.
- F. Timer Button for the air conditioner to turn Off or On. When a Time Delay is programmed, the Timer indicator light will illuminate. While the air conditioner is operating:
- Press the Timer button.
- Press the Up/Down Arrow buttons to select the number of hours you want the air conditioner to continue to operate before turning Off.
- G. Sleep
Press the Sleep button to activate sleep mode, press again to cancel.
The fan speed will automatically change to low speed and cannot be adjusted. The temperature will rise after 2 and 4 hours to ensure your comfort overnight. - H. Auto Swing
The louver on your portable air conditioner will open automatically when you turn it on (do not pry it open- When your AC is turned on, the louver will swing up and down.
- You can press the Auto Swing button to fix the louver in your desired position
The display will always default to show the room temperature.
When the air conditioner is turned on, it will automatically start in the last mode and fan settings selected.
Cool Mode
Use the Cool mode for cooling.
To set the Cool mode:
- Press the MODE button until the Cool indicator light is lit.
- Press the FAN button to set the fan speed.
- Press + or – to set the desired temperature.
After settings have been made, the display will change back to show the room temperature.
The temperature control is used to maintain the room temperature. The compressor will cycle on and off to keep the room at the set level of comfort. Set the temperature control at a lower number and the indoor air will become cooler. Set the temperature control at a higher number and the indoor air will become warmer.
Cooling Descriptions
For Normal Cooling—Select the Cool mode and set the temperature.
For Maximum Cooling—Select the Cool mode and set the temperature.
For Quieter & Nighttime Cooling—Select the Cool mode and LOW fan speed with a middle set temperature.
Dry Mode—Dehumidification
Use the Dry mode to provide dehumidification only. The fan will run at a fixed speed at this setting, so a fan speed cannot be set. Keep windows and doors closed for the best dehumidifying effects.
To set the Dry mode:
- Press the MODE button until the Dry indicator light is lit.
FAN Mode
Use the FAN mode to provide air circulation and filtering without cooling.
To set the FAN mode:
- Press the FAN button until the desired indicator light for high, medium, or low fan speed is lit.
- Since fan only settings do not provide cooling, a set temperature will not be displayed. After FAN speed has been set, the display will change back to show the room temperature.
The exhaust hose and window kit do not need to be installed when operating in fan mode.”
HEAT Mode (for Heat/Cool models only)
Use the Heat mode at Low, Med, or High Speed for heating. Using the speed button to increase (+) /Decrease (-) buttons to set the desired temperature.
An electronic thermostat is used to maintain the room temperature. The heater will cycle on and off to keep the room at the set level of comfort.
Remote Control
Features and appearance may vary.
- Insert Batteries to remote.
- Aim the remote control at the signal receiver on the control panel to operate the air conditioner.
- A. POWER
Turns the air conditioner on or off.
NOTE: Turning off power by pressing the POWER button does NOT disconnect the appliance from the power supply.- Press the POWER button. The Power indicator will illuminate.
- B. MODE
Press the MODE button to toggle among the operating options. The corresponding indicator will illuminate: Cool – Cools the room to the set temperature
Dry – Reduces the humidity in the room
Fan – Circulates the air in the room without cooling temperature - C. Temperature
Adjusts the Temperature or Hours in Time Delay.
To Set the Temperature:- Press the MODE button until the Cool mode is selected.
- Press the + or – buttons to select the Temperature.
- D. FAN SPEED
The FAN SPEED can be adjusted from Low, Medium, to High speed when the air conditioner is in operation. NOTE: The fan speed cannot be adjusted when the unit is in Dry mode.
• Press the FAN SPEED button to toggle among the three speeds. The corresponding fan speed indicator will illuminate. - E. TIMER conditioner to turn Off or On. When a Time Delay is programmed, the Timer indicator light will illuminate.
- F. SWING
The louver on your portable air conditioner will open automatically- When your AC is turned on, the louver will swing up and down.
- Press the auto swing button to fix the louver in your desired position.
Care and Cleaning
CLEANING
Electrical Shock Hazard
Disconnect power before cleaning.
Failure to do so can result in death or electrical shock.
- Unplug or disconnect power.
- Use only a soft cloth dampened with water to clean the cabinet.
NOTE:- Do not use a liquid or spray cleaner to clean the air conditioner.
- DO NOT use chemicals, abrasives, ammonia, chlorine bleach, concentrated detergents, solvents or scouring pads. Some of these chemicals/items may damage and/or discolor your air conditioner.
- Dry thoroughly with a soft cloth.
- Plug in or reconnect power.
Air Filter
The air filters should be cleaned at least every two weeks for your unit to operate at optimum efficiency.
DO NOT operate the air conditioner without a filter because dirt and lint will clog it and reduce performance.
To remove:
- Unplug or disconnect power.
- Pull to remove the filter panels.
- Remove the filters from the panels.
- Wash or vacuum the dust from the air filters.
- Reinstall the filters onto the panels.
- Replace both filter panels
- Plug in or reconnect power


Internal Water Tank
The Water Full indicator (“FL” on the control panel filled with condensed water. The unit will not cool until the tank has been emptied to prevent overflow and possible damage to the floor under the AC. To Empty the Internal Water Tank:
- Unplug or disconnect power.
- Place a shallow 1 1/2 quart or larger pan
- Remove the cap and the rubber plug and drain the water tank.
- Re-insert the drain plug and screw the cap snugly into place.
- Plug in or reconnect power.
Continuous Draining
(optional and only in dry mode)
- Remove the top drain cap.
- Connect a hose with a garden hose connection to the outlet.
- Route the drain hose to a suitably sized container* or a floor drain.
* Be sure to use a large container (3 gallons or larger container continuously. The unit will not shut off when the container is full. An overflowing container can cause flooding and damage to the floor.”
Storage
If the unit is not being used for a long period of time: To Empty the Internal Water Tank:
- Unplug or disconnect power.
- Use the original packaging to repack the unit to avoid a buildup of dust or dirt.
- Store the air conditioner in a cool, Dry location.
How to Insert the Batteries in the Remote Control
- Remove the battery cover by sliding it according to the arrow direction.
- Insert new batteries, of battery are installed correctly.
- Reattach the cover by sliding it back into position.
Installation Instructions
Questions? Call GE Appliances at 866.907.1655 or visit our Website at: GEAppliances.com
BEFORE YOU BEGIN
Read these instructions completely and carefully.
- IMPORTANT — Save these instructions for local inspector’s use.
- IMPORTANT — Observe all governing codes and ordinances.
- Note to Installer – Be sure to leave these instructions with the Consumer.
- Note to Consumer – Keep these instructions for future reference.
- Skill level – basic mechanical skills.
- Completion time – Approximately 1 hour
- We recommend that two people install this product.
- Proper installation is the responsibility of the installer.
- Product failure due to improper installation is not covered under the Warranty.
- You MUST use all supplied parts and use proper installation procedures as described in these instructions when installing this air conditioner.

Location Requirements
Place the air conditioner on a flat
- Keep the air conditioner free of any obstructions such as drapes, curtains, blinds, etc.
- The exhaust hose should be free of any obstructions.
- Do not place the air conditioner on an unstable or raised surface because it could fall and cause damage or injury.
- Do not place the air conditioner in direct sunlight or near a heat source such as baseboard heaters, stoves, etc.
- The window panel can be installed in a window with opening.

Installation Instructions
PARTS INCLUDED
(Appearance may vary)

- Auto Swing Louver
- Controls
- Built-in Handle
- Caster (4)
- Upper Filter Panel
- Top Continuous Drain
- Exhaust Vent
- Lower Drain
- Plug
- Cord winder
- Lower Filter Panel
- Power Cord
- Remote Control
- 2 AAA batteries

Window Panel Combinations to fit window openings
(Appearance may vary)

UNPACK AIR CONDITIONER
Excessive Weight Hazard
Use two or more people to move and install air conditioner.
Failure to do so can result in back or other injury.
- Remove packaging materials. Save the carton and the foam packaging for storing the air conditioner when not in use.
NOTE: There are NO packing materials inside the air conditioner to remove—Do Not open the cabinet. - Properly dispose of/recycle all packing material.
- Handle the air conditioner gently.
- Keep the air conditioner upright and level. Do not set the air conditioner on its side, front, back or upside down.
Assemble Exhaust Hose Assembly and Mount to Back of Unit
Extend the exhaust hose approximately 4” from each end. Screw the adapters onto the ends of the round adapter into the exhaust vent on the back of the Air Conditioner and turn counter-clockwise to secure it.

Install Exhaust Nozzle to Main Window Panel

- Hold the main window panel so that the L-shaped edges of the panel are facing you.
- Align the exhaust nozzle with the slots in the opening, and then insert and slide the nozzle to access the hole from the back of the main window panel.
- Turn the main window panel over, so that the nozzle is away flat tip screw through the hole to fasten the window panel to the adapter.
Install Main Window Panel and Extension Panels
NOTE: Measure the window opening and use the extension panels as referenced on page 11 to fit your window.
- Open the window and place the window kit assembly into the window.
NOTE: The window assembly is designed to accommodate either a double hung or sliding window.
- Adjust the panels
- Depending on the number of extension panels used, turn the knobs to secure the extension. Install from the back.

- For vinyl windows only.
Skip to step 6 for wood windows.
Place the two top window brackets and two bottom window brackets where they will best support the extension panels. Use pointed screws to attach top bracket to the support panels.
- Apply the strip across the top of the window panel assembly, and then bottom front edge of the window panel assembly, as shown.

- Place the window panel assembly in the window, and using the screws provided, fasten the assembly to the window sill and window frame.

- Using one pointed screw, install the Security bracket to the window.
NOTE: The security bracket prevents the window from being opened from the outside.


Troubleshooting Tips
| Problem | Possible Causes | Solution |
| Unit does not start or operate | Power supply cord is not plugged into an outlet. | Plug the power cord into a grounded 3 prong outlet. |
| Power supply cord has tripped. | Press and release the RESET button on the power supply cord. | |
| The Power button has not been pressed. | Press the POWER button on the Control Panel or Remote Control to turn ON the air conditioner. | |
| There is no power to the electrical outlet. | Plug a working lamp into the outlet to check for power. | |
| A household fuse has blown or a circuit breaker has tripped. | Replace the fuse or reset the circuit breaker. | |
| The control was programmed for a Time Delay. | Cancel the Time Delay. See “Control Panel.” | |
| The batteries in the remote control are dead. | Replace the batteries. | |
| The internal water tank is full.
NOTE: The air conditioner automatically turns off, and the Water Full indicator (³)/´ RQ WKH FRQWURO SDQHO GLVSOD\) illuminates to alert you of this condition. | Empty the water tank. See “Air Conditioner Care.” | |
| Remote control is not working | Batteries are dead. | Replace the batteries. |
| Batteries are installed incorrectly. | Make sure the batteries are inserted in the correct position. | |
| Air conditioner is working but the room is not cooling. | The room temperature is hot.
NOTE: On extremely hot and humid days,the air conditioner will take longer to cool the room. | Allow time for the room to cool when you first turn on the unit.
Make sure the air conditioner has an adequate BTU rating for the size of the room being cooled. |
| The control is set incorrectly to Fan or Dry mode. | Set the Mode to Cool and the Fan Speed to High. | |
| Airflow is restricted. | Remove any obstacles to the airflow and redirect airflow for uniform cooling. | |
| Temperature set too high. | Lower the set temperature. | |
| Air filters are dirty or restricted. | Clean the air filter. See “Air Conditioner Care.” | |
| Air conditioner installed incorrectly | Check the exhaust hose and window panel for proper installation. | |
| Doors and windows are open. | Close the doors and windows to the room being cooled to prevent cooled air from escaping. |
Error Codes
| Error Codes | Meaning |
| E1 | Abnormal room temperature sensor |
| E2 | Abnormal refrigeration system sensor |
| FL | The internal water tank is full, refer to draining instructions on page 8 |
Wi-Fi Setup (on some models)
GE Appliances SmartHQ (for customers in the United States)
GE Appliances SmartHQ Enabled* on the outside as shown below, your AC is GE Appliances SmartHQ Enabled. A WiFi communication card is built into the product allowing it to communicate with your smart phone for remote monitoring, control and notifications. Please visit GEAppliances.com/connect to learn more about connected appliance features, and to learn what connected appliance apps will work with your smart phone. Please call 800.220.6899 for assistance.

How it Works
- Download the SmartHQ app
- Use the app to connect your room air conditioner to WiFi
- Once connected, use the app to turn down your air conditioner as you leave work.


Getting Started
To connect your room air conditioner, you’ll need the GE Appliances App. The app will walk you through the connection process. Download the app from iTunes or Google Play.
All connected appliace data is held in strict accordance with the GE Appliances Connected Data Privacy Policy. Visit geappliances.com/privacy/privacy_policy_connected to view this policy.
Questions about SmartHQ
Get answers you need about setting up WiFi appliances and connecting to your home network in our support articles.
Visit products.geappliances.com/appliance/gea-support-search-content to view wifi connect room air conditioner support articles.
REGULATORY INFORMATION
FCC/IC Compliance Statement:
This device complies with Part 15 of the FCC Rules. Operation is subject to the following two conditions:
- This device may not cause harmful interference.
- This device must accept any interference received, including interference that may cause undesired operation.
This equipment has been tested and found to comply with the limits for a Class B digital device, pursuant to Part 15
of the FCC Rules. These limits are designed to provide reasonable protection against harmful interference in a residential installation. This equipment generates uses and can radiate radio frequency energy and, if not installed and used in accordance with the instructions, may cause harmful interference to radio communications. However, there is
no guarantee that interference will not occur in a particular to radio or television reception, which can be determined by turning the equipment off and on, the user is encouraged to try to correct the interference by one or more of the following measures:
- Reorient or relocate the receiving antenna.
- Connect the equipment into an outlet on a circuit different from that to which the receiver is connected.
- Consult the dealer or an experienced radio/television technician for help.
Labelling: Changes or modifications to this unit not expressly approved by the manufacturer could void the user’s authority to operate the equipment. - *Select Models Only connectivity and a wireless router to enable interconnection with an Energy Management System, and/or with other external devices, systems or applications.
Limited Warranty
| For The Period Of: | Will Replace: |
| One Year From the date of the original purchase | Replacement, repair, or refund of the original retail price for any product which fails due to a for the remainder of your product’s original one-year warranty period. GE Appliances will, at its sole discretion, replace the product with a product of the same or comparable functionality and quality or refund the original retail price. |
In Order to Make a Warranty Claim During the First 90 Days from the Date of Original Purchase:
- Properly pack your unit. We recommend using the original carton and packing materials.
- Return the product to the retail location where it was purchased.
- other evidence of date of original purchase. Also print your name and address and a description of the defect.
In Order to Make a Warranty Claim During the Remainder of the One-Year Warranty:
- Locate your original sales receipt and make a note of your model and serial number.
- Call 866.907.1655 or visit GEAppliances.com/service initiate the product replacement process.
- You will be asked to provide your name, address, date of purchase, model and serial number.
- GE Appliances will arrange for a carton to be sent to your home to recover the product.
- Please return all requested materials (postage description of the defect.)
- You should receive your replacement product or refund within 7 to 10 business days after your package is received.
What Will Not Cover:
- Customer instruction. This owner’s manual provides information regarding operating instructions and user controls.
- Failure of the product resulting from modifications to the product or due to unreasonable use including failure to provide reasonable and necessary maintenance.
- Replacement of house fuses or resetting of circuit breakers.
- Failure due to corrosion on models not corrosion-protected.
- Damage to the product caused by improper power supply voltage, accident, fire, floods or acts of God.
- Damage caused after delivery.
EXCLUSION OF IMPLIED WARRANTIES – Your sole and exclusive remedy is product repair as provided in this Limited Warranty. Any implied warranties, including the implied warranties of merchantability or fitness for a particular purpose, are limited to one year or the shortest period allowed by law.
For US Customers: This limited warranty is extended to the original purchaser and any succeeding owner for products.
Some states do not allow the exclusion or limitation of incidental or consequential damages. This limited warranty gives you specific legal rights, and you may also have other rights which vary from state to state. To know what your legal rights are, consult your local or state consumer affairs office or your state’s Attorney General.
Warrantor US:
GE Appliances, a Haier company
Louisville, KY 40225
49-5000544 Rev. 1
Consumer Support
GE Appliances Website
Have a question or need assistance with your appliance? Try the GE Appliances Website 24 hours a day, any day of the year! You can also shop for more great GE Appliances products and take advantage of all our on-line support GEAppliances.com
Register Your Appliance
Register your new appliance on-line at your convenience! Timely product registration will allow for enhanced communication and prompt service under the terms of your warranty, should the need arise. You may also mail in GEAppliances.com/register
Schedule Service
Expert GE Appliances repair service is only one step away from your door. Get on-line and schedule your service at GEAppliances.com/service or call 800.432.2737 during normal business hours.
Contact Us:
GEAppliances.com/contact
FAQS
A window air conditioner is designed to be installed in a window. A portable air conditioner is designed to be moved from room to room.
The portable air conditioner must be installed outside of the window opening. The top of the unit must not extend beyond the top of the window opening.
Plug into a grounded 3 prong outlet. Do not remove ground prong. Do not use an adapter. Do not use an extension cord. Do not operate the air conditioner if it has a damaged cord or plug, if it is not working properly, or if it has been damaged or dropped.
The amount of electricity used depends on several factors, including but not limited to room size, temperature setting, fan speed and operating time.
Refer to Care and Cleaning section for cleaning instructions.
Portable Air Conditioner
Remote Control
There is a plug on the back you just take off. Make sure to have in the tub or somewhere safe to empty
Inside the unit, there is a slinger ring that picks up the water and flings it on the hot condenser so it can evaporate. Typically you will not need to empty the storage tank, except if there is excessive water. This may occur when you use Dehumidify Mode or when you first connect the air conditioner.
GE and GE Profile also offer several ENERGY STAR® compliant ACs that provide cooling with energy efficiency. Our portable room air conditioners cool upstairs rooms, attics, garages, and more and can be moved easily from room to room.
Mid-sized portable air conditioners use an average of 2900 watts per hour. Particularly large units can exceed the electricity usage of even central air conditioners, expending about 4100 watts per hour.
Untimely drainage of air conditioners leads to overflowing of the condensate tank. Though it will not cause any serious issues, it leads to water damage at your home. Growth of bacteria and mold.
Portable air conditioners can be remarkably convenient for many homeowners and renters, and they are an affordable way to bring a little cool air into your living space. They can also be a lifesaver if your regular air conditioner is broken — you can get them up and running quickly while you wait for repairs.
If the air filter is clogged, air cannot flow properly through the air conditioner. This greatly reduces the cooling capacity of the air conditioner. In addition, if the air filter is clogged, the evaporator coils will frost over. To remove debris from the air filter, try cleaning the filter.
Owing to dirty air filters, there is a chance of airflow being congested. This will cause the evaporator coil to freeze. When the evaporator coil freezes, the AC unit automatically turns ON and OFF.
VIDEO
![]()
Documents / Resources
 | GE APPLIANCES Portable Room Air Conditioner [pdf] Owner's Manual Portable Room Air Conditioner, APCD07, APWD07, APCD08, APWD08, APSD08, APCD10, APWD10, APXD10 |
References
 Appliance Parts, Accessories & Water Filters | GE Appliances
-
Kitchen Appliances, Refrigerators, Dishwashers | GE Appliances
-
Connect Your Smart Appliances
-
Contact Us or Get Help with Questions | GE Appliances
-
GE Appliances - Going to Assurant Web Site
-
Privacy Statement
-
GEAppliances.com/register
-
Appliance Repair Service and Support | GE Appliances